
우분투에 장고 개발 환경 구축하기


last modified 2011-08-13 21:08:26
Processing time 0.0132 sec


3.1.1. 설치 
# apt-get install postgresql python-psycopg2 pgadmin3
설치가 완료되면 postgres (관리 계정) 비밀번호를 변경한다.
# sudo -u postgres psql postgres
postgres=# \password postgres 3.1.2. 사용자 및 DB 생성 
$ sudo -u postgres createuser -D -A -P myuser
이 새 롤에게 또 다른 롤을 만들 수 있는 권한을 줄까요? (y/n) n $ sudo -u postgres createdb -O myuser mydb 3.2.2. 사용자 및 DB 생성 
$ mysql -u root -p
> CREATE DATABASE mydb; > CREATE USER 'myuser'@'localhost' IDENTIFIED BY 'some_passwd'; > GRANT ALL PRIVILEGES ON mydb.* TO 'myuser'@'localhost' WITH GRANT OPTION; > QUIT; 4. 이클립스에서 프로젝트 생성 ¶File - New - Project - Pydev Django Project
(과정중 django 설치되어 있음에도 불구하고 'django not found' 메시지 출력시
상단 메뉴에서 Window - Preference - Interpreter - Python 에서 인터프리터 제거 후 다시 추가)
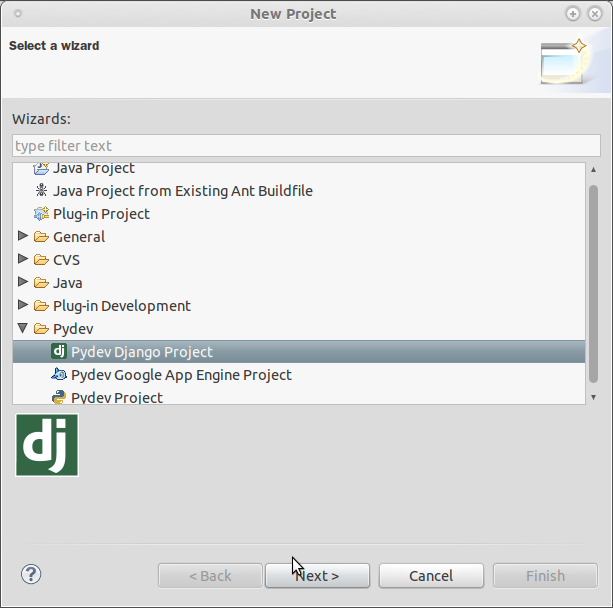 [PNG image (51.82 KB)] 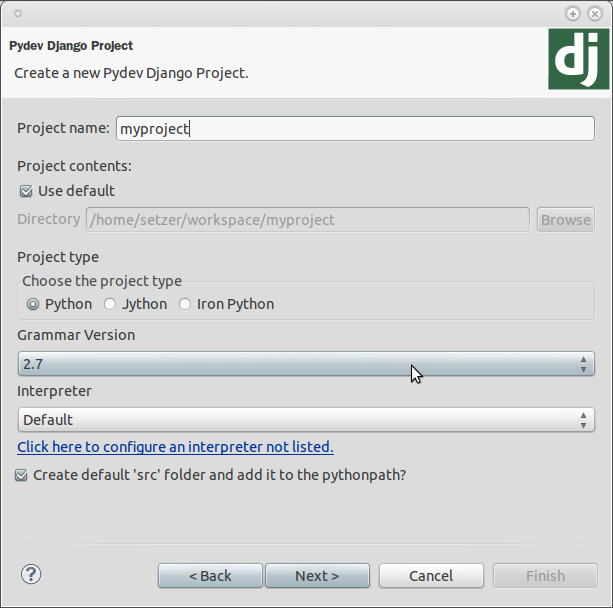 [PNG image (56.37 KB)] 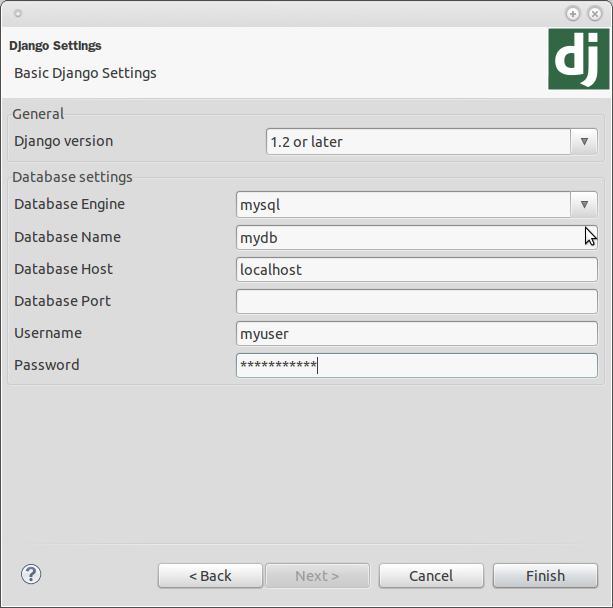 [PNG image (43.68 KB)] src/myproject/settings.py 파일을 열어
- TIME_ZONE = 'America/Chicago' 을 'Asia/Seoul' 로 수정
- LANGUAGE_CODE = 'en-us' 를 'ko-kr'로 수정
5. 설치 테스트 ¶프로젝트 문맥 메뉴 - Django - Run Django Tests(manage.py test) 실행
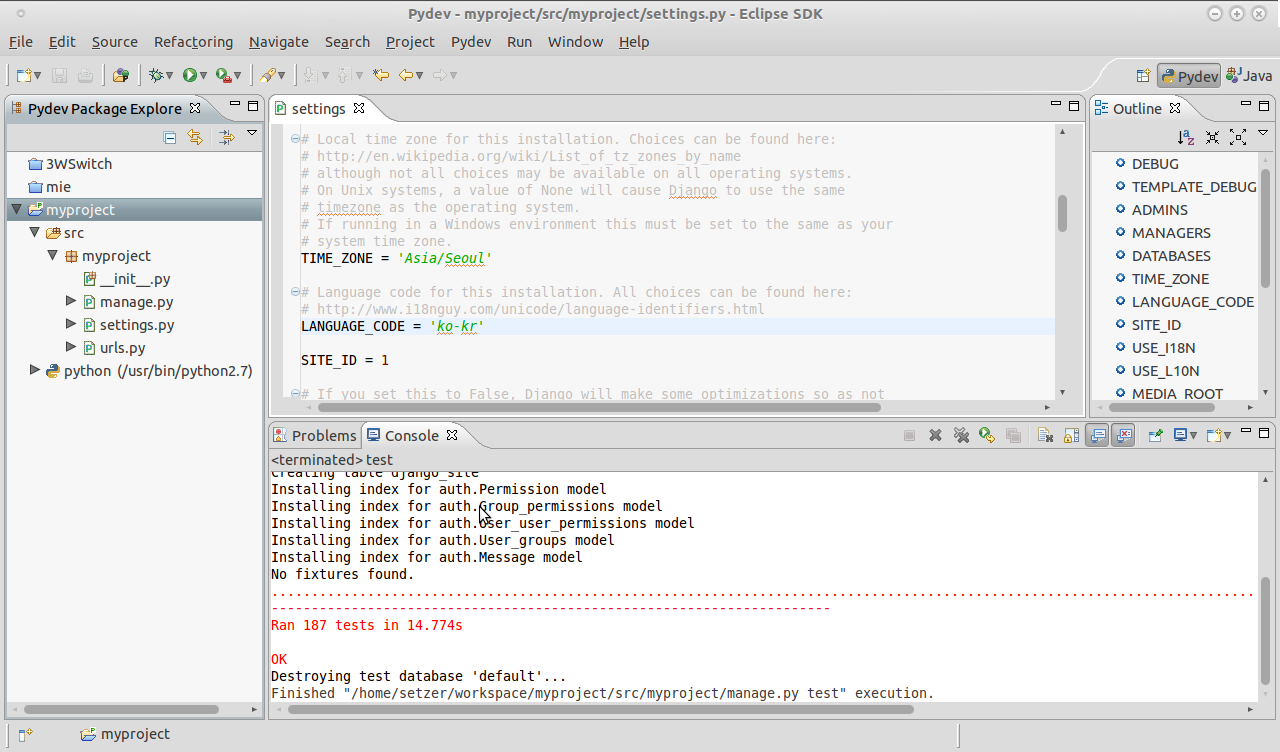 [PNG image (165.01 KB)] 문제 없는 것을 확인 후
프로젝트 문맥 메뉴 - Run As - Pydev: Django 실행
브라우저를 띄운 후 http://127.0.0.1:8001 접속
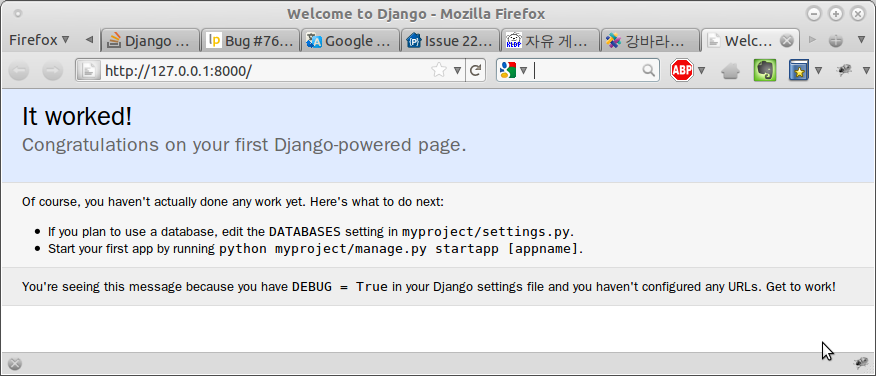 [PNG image (66.1 KB)] 7. Admin 활성화 
from django.contrib import admin
admin.autodiscover() ... # Uncomment the next line to enable the admin: (r'^admin/', include(admin.site.urls)),
|
His heart was yours from the first moment that you met.    
|
![[http]](/imgs/http.png)
last modified 2011-08-13 21:08:26
Processing time 0.0132 sec